
Anti-theft Device
The world is becoming lazy as we head towards mind-blowing technologies. If we take the example of our own house sometimes we forget to close the door or window. Recently I made this project for a test purpose configuring an Internet of things(IoT) device which involves an ultrasonic sensor and nodeMCU (WiFi module). Our Ultrasonic sensor is mainly use in the project to measure the distance.
hence, it is the most popular device to be refer among the DIY circuits community. however, You can find many tutorials on the internet on how to interface ultrasonic sensors with Arduino and other different microcontrollers?
But before interfacing the ultrasonic sensors with nodeMCU we need to understand the power requirements of the two modules.
Well, I have searched for many tutorials on the internet about interfacing the ultrasonic sensor with nodeMCU but not a single one worked for me, also many people in the comments complained about the circuit power constraints. So in this tutorial, I will explain to you properly the power requirements of the two modules and how to interface them properly.
If you are a beginner don’t worry you can easily make this project by yourself.
To start with me make sure you have the enlisted devices or components with you.
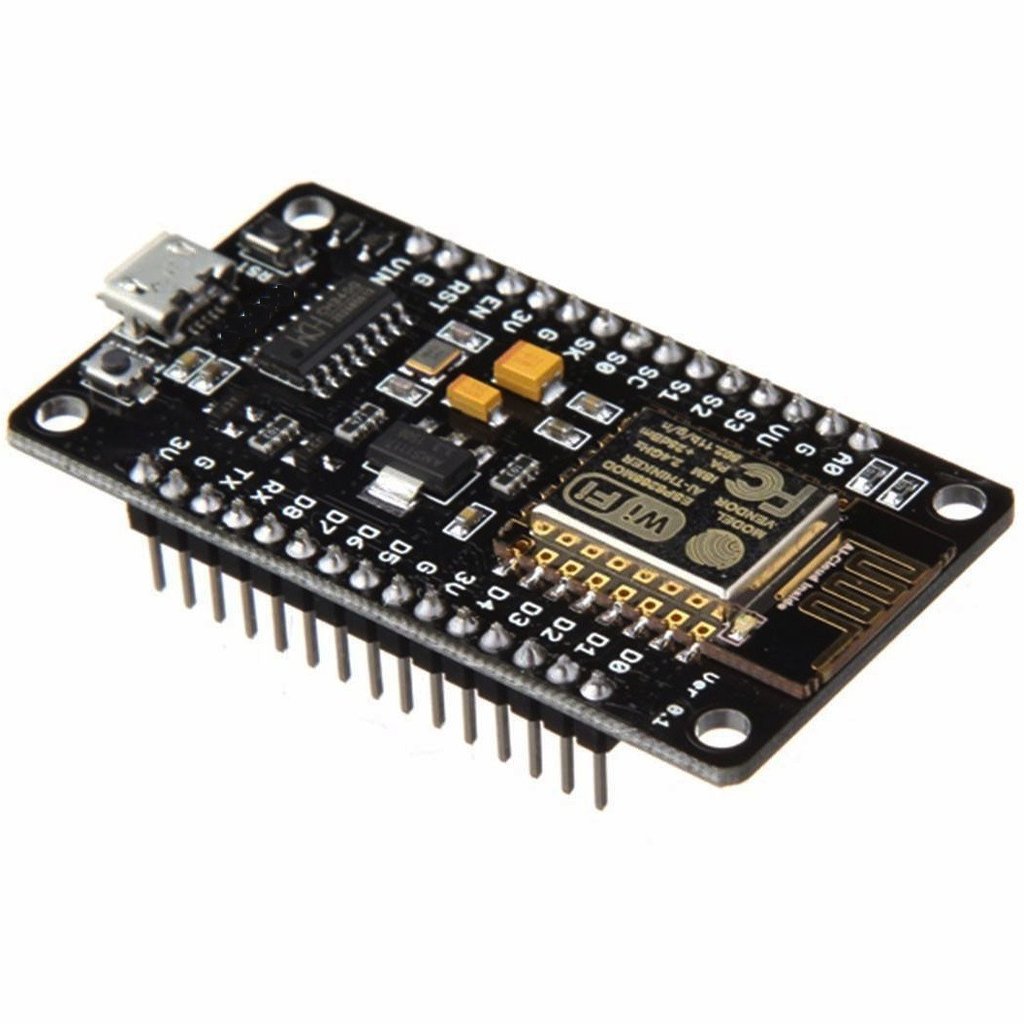
- NodeMCU
- Ultrasonic Sensor
- Bread-Board
- Connecting Wires.
All the components are easily available on online stores like Amazon, Flipkart, also you can buy it from the market which will cost you cheaper. Ok so let’s head towards our project, the basic aim of our project is to measure the distance between our door/window and its lock. What we will do is that if the distance between the door and its lock is greater than 0cm then we will make an alarm active which will notify us that our door is open or window is open and by this way, we can make our home very secure from thieves or strangers.
WORKING PRINCIPLE | using NodeMCU
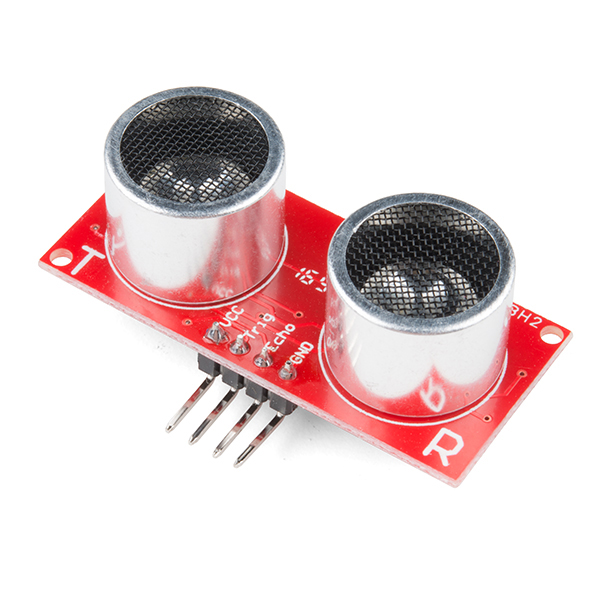
The working principle of an ultrasonic sensor is very simple and easy to understand. It has two faces or you can say two sensors, one is an echo pin where the other is trigger pin. The trigger pin basically triggers or generates sound waves which are than accept or receive by the echo pin.
therefore, The concept is very simple, that is until the echo pin doesn’t fail to receive any wave it will continuously give the distance of the ultrasonic sound wave travelled from trigger pin to echo.
The working of NODEMCU will be just to read the distance data from the Ultrasonic sensor and notify us with proper measurements.
Circuit Diagram
The CiRcuit connections are very simple. If you take a look down to our ultrasonic sensor then you will see there are four pins named 5VOLT, Trigger, Echo, Ground (from left to right) which will also be written there don’t worry, so connect the 5volt pin with a proper 5volt source and ground to the ground of that source.
Trigger and echo pins of our ultrasonic sensor should connect to GPIO-2 and GPIO-0 or D4 and D3 pins of the nodeMCU.
Time is transform into distance using the speed of sound in air formula. According to the universal speed of sound in air formula
Time = Distance / Speed
Where Speed = speed of sound in air. Which is 340 m/s
Hence reorganizing the formula Distance = Time * 340(speed of sound in air).
Make sure to use this formula in the code
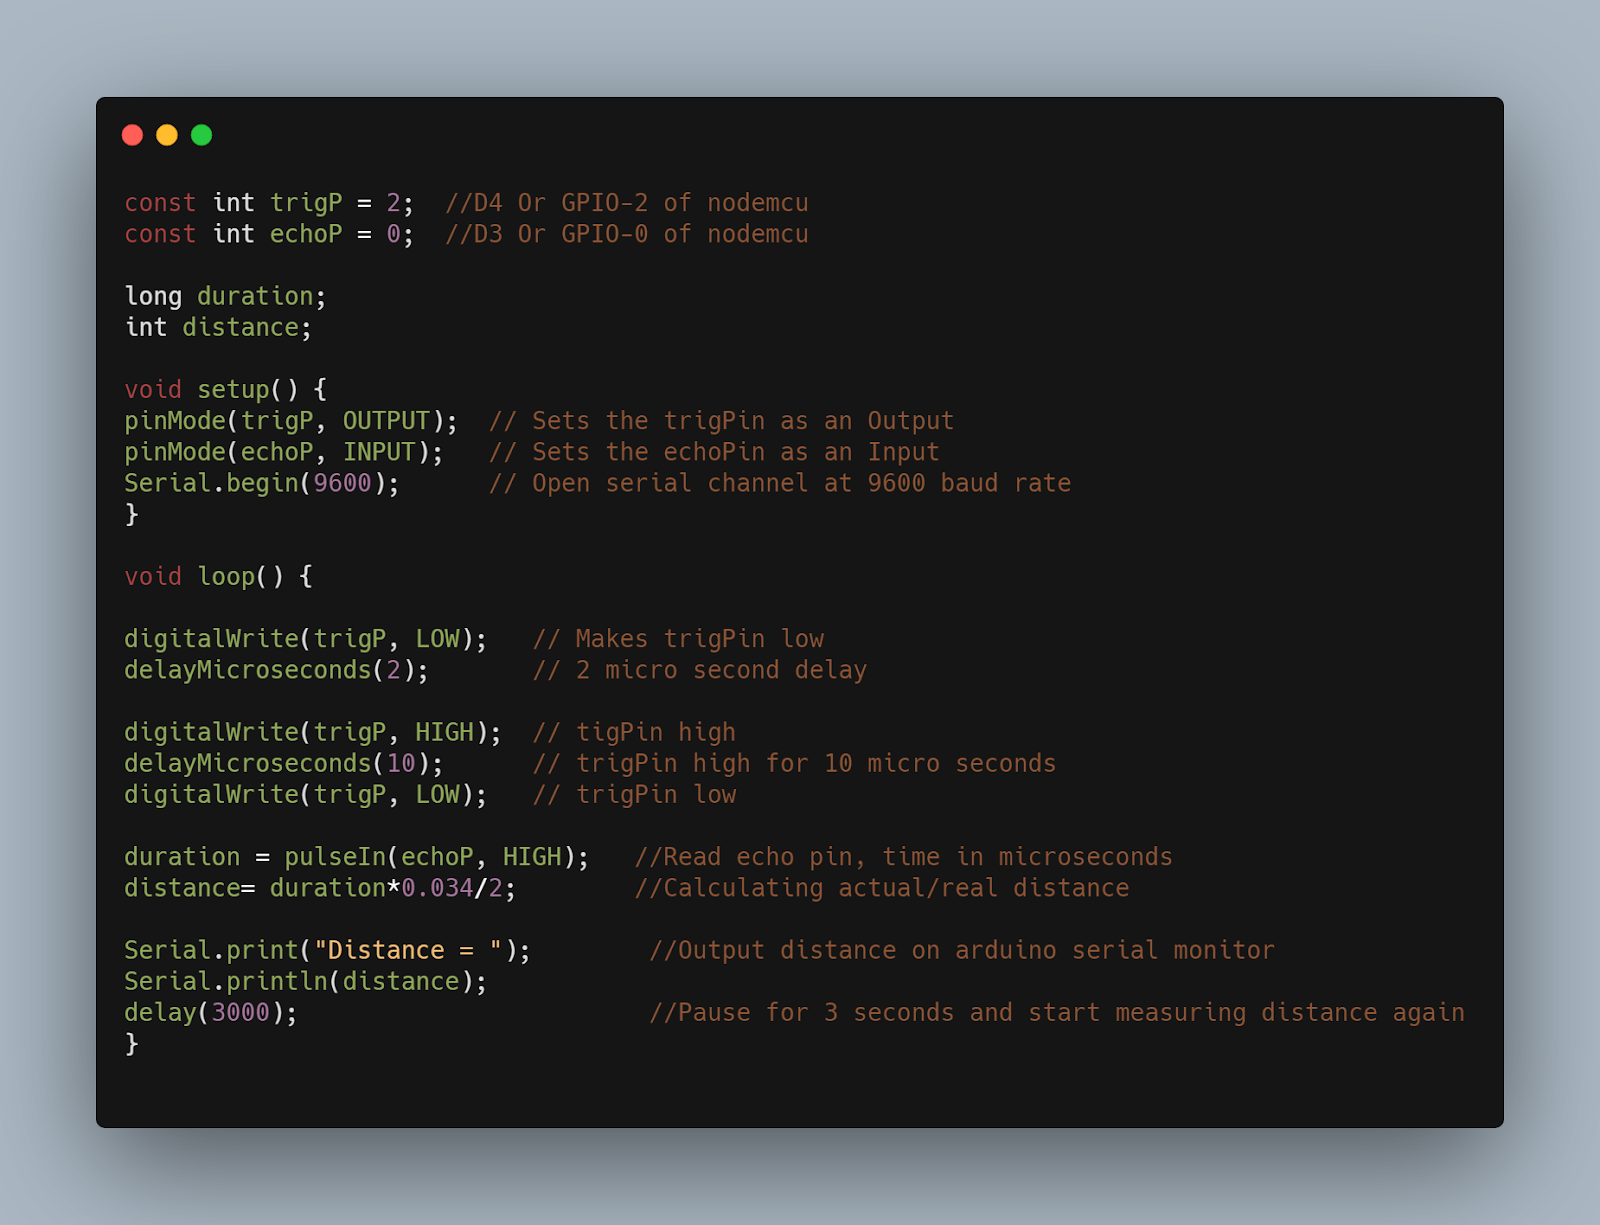
Source Code
Before writing your code make sure you have downloaded ARDUINO IDE successfully and installed ESP8266 library also, select the com port then and upload your code.
Note: You can also change the distance in your code with applying if-else logical operator to control safe distance which will activate the buzzer or alarm if you have attached it with.
hence, Okay now we are done with our project, and it’s time to test for the final OUTPUT. therefore, For that simply connect your NODEMCU to any USB power cable to turn it on and upload code using ARDUINO IDE. so, Now you can control the ultrasonic sensor and measure the distance.
finally, Try doing this project to yourself and hope we will earn great knowledge.
Reference images:
- Unsplash.com
- Pixels.com
- nodeMCU Image is taken from this link Wikimedia Commons.
- Ultrasonic sensor image is taken from this link Wikimedia Commons.
Written by: Ankan Ghosh
Reviewed by: Batta Pruthvi
If you are Interested In Machine Learning You Can Check Machine Learning Internship Program
Also Check Other Technical And Non Technical Internship Programs