
To Install Jupyter Notebook In your PC follow the Below Process.
Visit the Anaconda download page.
Go to the following link : https://www.anaconda.com/
Select the Individual Edition from the drop down arrow of the Product tab.

Check downloads , Click on install
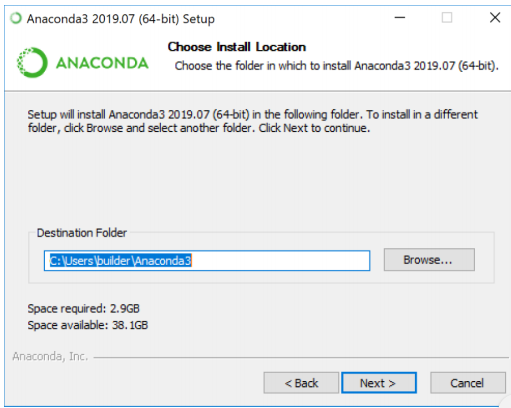
Click Next
Choose Register Anaconda as my default Python 3.7
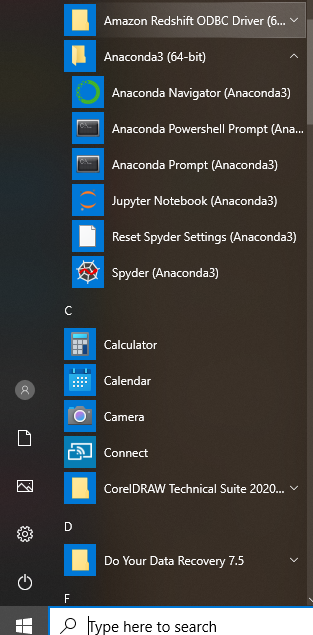
Use Anaconda software by opening Anaconda Navigator or the Anaconda Prompt from the Start Menu.
Click install
“Thanks for installing Anaconda” dialog box
Click Finish
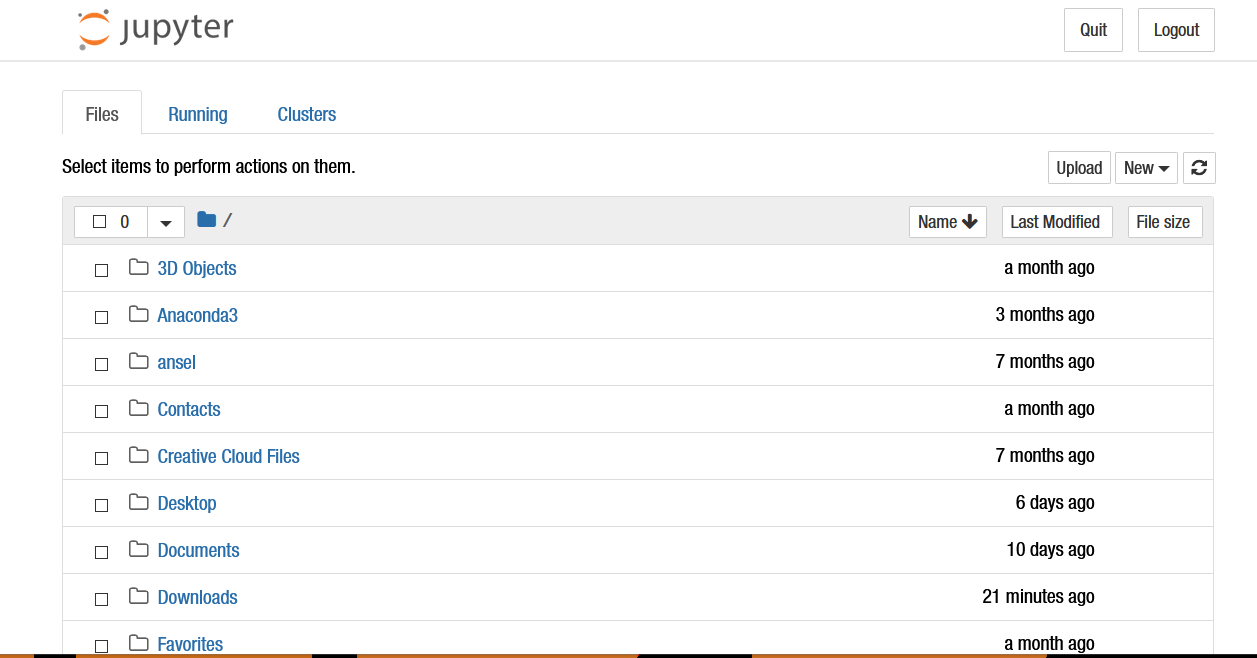
You will be directed to the following screen after you have opened Jupyter Notebook.
Here, select New and you will be directed to a new Notebook.

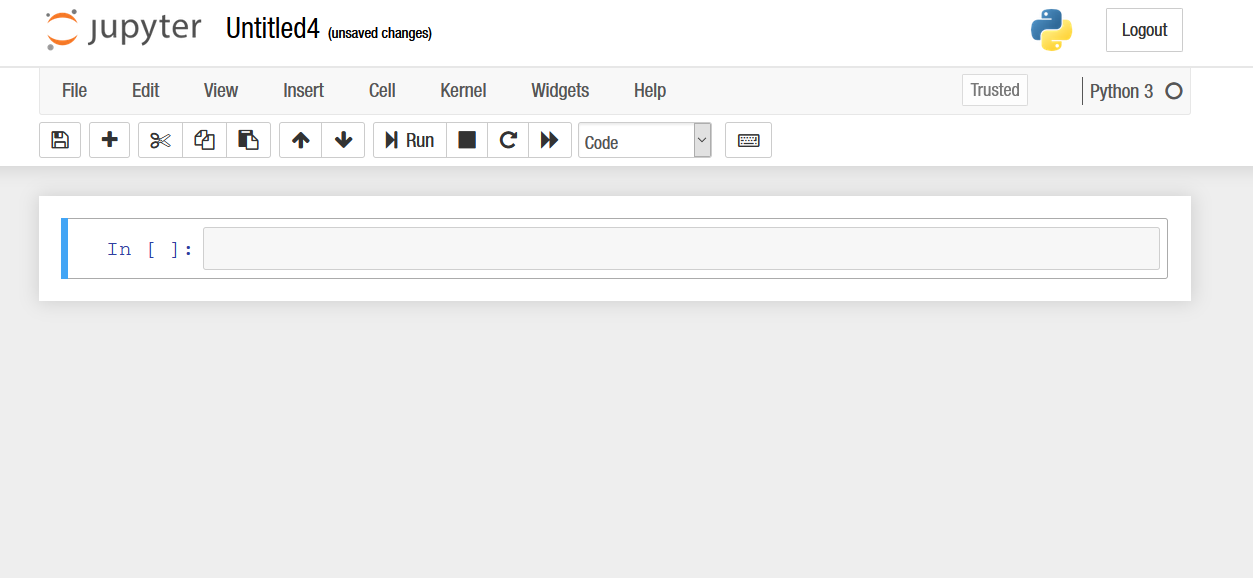
This is how a New Jupyter notebook looks like .
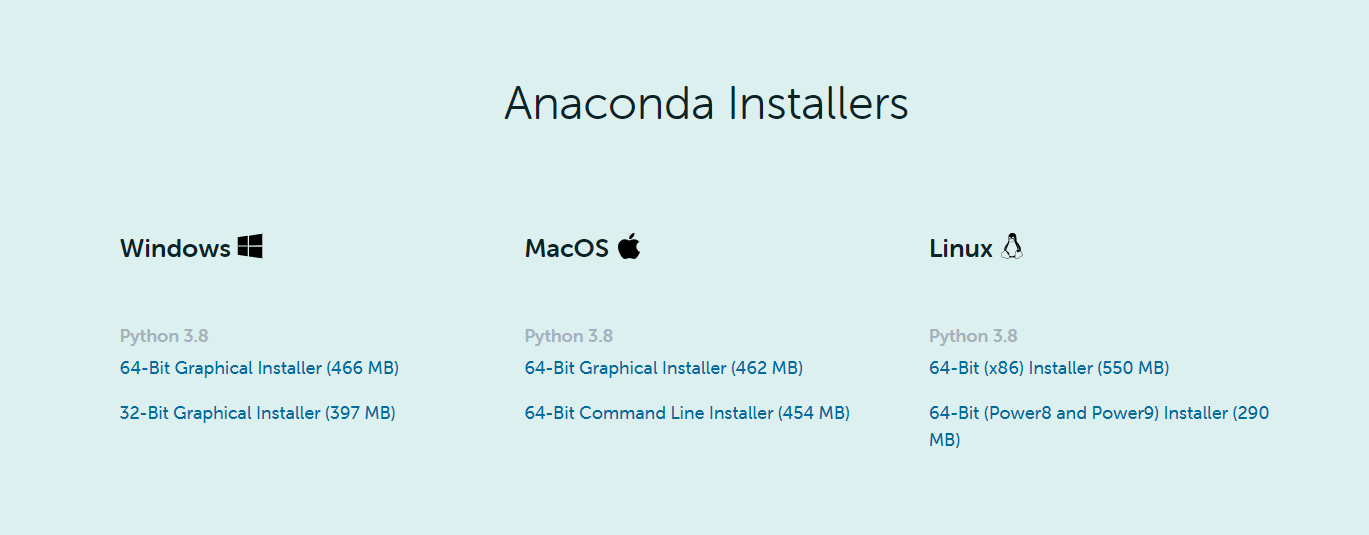
Click here Download (64 Bit), 32 Bit and follow the Steps as given below:
Download the appropriate OS version & prefer the latest version always
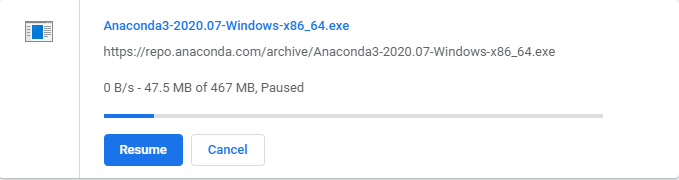
Double click the installer to launch.
After downloading a set-up page appears as shown below:
- Read the licensing terms and click “I Agree”.
- Select an install for “Just Me” unless you’re installing for all users (which requires Windows Administrator privileges) and click Next.
- Click Next
- After a successful installation you will see the
- Now, Click on Windows button and Search for ‘Jupyter Notebook’