

Nowadays, home automation is creating a great buzz in the world. We came across many voice assistants like Alexa, Siri, and Google Assistant, through which we can control our home appliances like led lights. Imagine how fascinating it would be if you could design a similar system on your own!
So let’s take deep dives into the procedure for controlling lights by google’s voice assistant using Bolt Iot API.
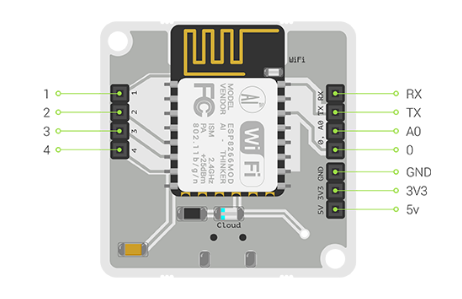
Hardware Requirement:
- Bolt wifi module
- USB Cable
- Led (5 mm)
Software Requirement:
- Google Assistant
- Bolt Cloud
- Bolt Android app
- IFTTT (Webhooks a Google Assistant)
We will now step by step see how to carry out these hardware and software together into our project:
Step 1)
First of all take the led, it has two legs one having a longer leg is called the positive terminal, and the shorter leg is the negative terminal. Now, put the negative terminal (shorter) of led in the ground pin of the module and the positive terminal in any of the 0, 1, …4 pins. Now power on your module using a USB Cable through a laptop or an android charger and make sure you have configured your device earlier for more details for setting up your bolt cloud account you can take the help of the documentation section.
Step2)
After successfully setting up the hardware and connecting your module with bolt cloud you can go to the API section in bolt cloud and note down your device name and API for future use.
Step3)
Before moving to IFTTT you need a specific URL with your unique device API and device name. Below are certain terminologies:
- DeviceName: Unique name of your bolt device which you are going to control.
- Pin: This indicates the GPIO you are going to control. There are five GPIO’s 0, 1, 2, 3, 4 which we can use.
- state: The output voltage to be provided on the GPIO can take a value, either HIGH(3.3V) or LOW(0V).
Now keep aside your URL of the following format for making a web request via webhooks. https://cloud.boltiot.com/remote/your_unique_api_key/digitalWrite?pin=0&state=HIGH_or_LOW&deviceName=Your_device_name
Replace your_unique_api_key with your API Key and Your_device_name by your device name. High/LOW is decided by whether you wanted to turn on or off the light.
Step4)
Once you are done with your module set-up you can now move to create an IFTTT account if you haven’t done it before, but make sure you are creating it with the same google account or Gmail id with which you will be accessing voice assistant.
Step5)
Now click on the button for creating a new applet.
Step6)
A button, “If This” similar as shown below will appear, click on “Add” to create the trigger.

Step7)
Now choose google assistant from the menu.

Once you have chosen Google Assistant for the “If This” trigger it will ask your consent for connecting it further, so please click on the connect button as shown.

Step8)
Since the input sentence which you will be asking the assistant to do is a simple sentence for turning on the lights, you have to choose the trigger for a simple phrase only as shown below.
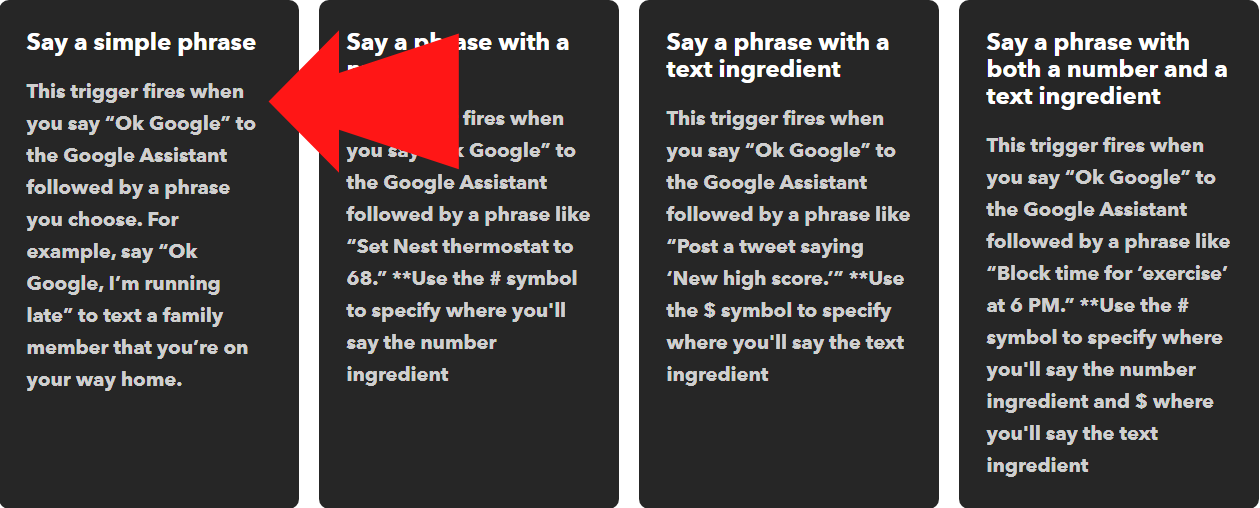
Step 9)
The service will now ask you for what you want to say in the best three ways possible, to recognize what trigger has been made.
You can change the sentence frame also, but keep in mind that you choose simple relatable triggers.

Step 10)
Once you are done with “If This”, it will ask you for “Then That”, i.e. if you have given a certain command what task you need to be done. So, click on Add at “Then That”.

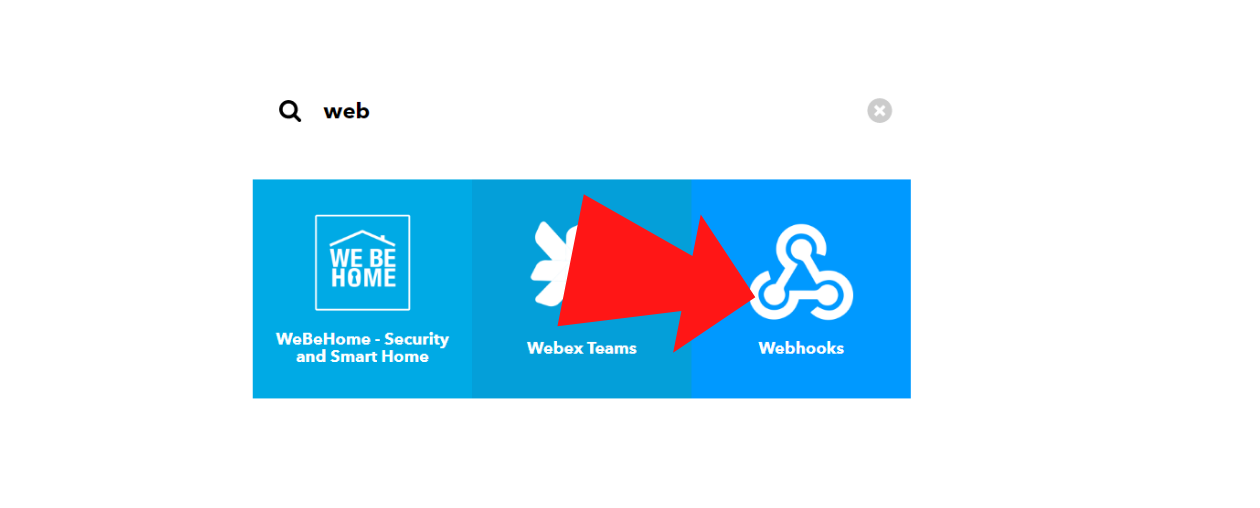
Step 11)
Search for Webhooks and click on that. Actually, webhooks work under a triggered event and they can communicate with third party API’s to get the user’s work done and can thus provide real-time information.
Step 11)
Now it will ask you to enter your URL containing API and Device Name, specifying the HIGH/LOW signal status. Fill the field accordingly as stated earlier in Step 3 and choose the method as GET and content type Application/Json.

Now simply click on finish and here you have completed your trigger successfully for turning on the light.

You can also create one more trigger for turning off the light, for this, all the procedures would be the same, only HIGH would be changed to LOW in the URL and change the sentence to turn off the light.
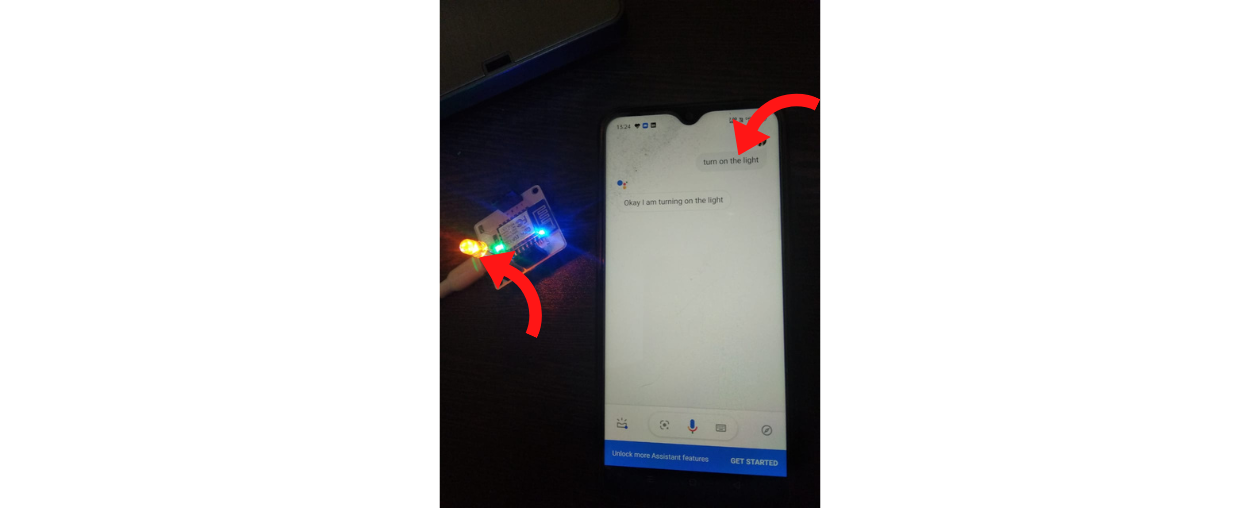
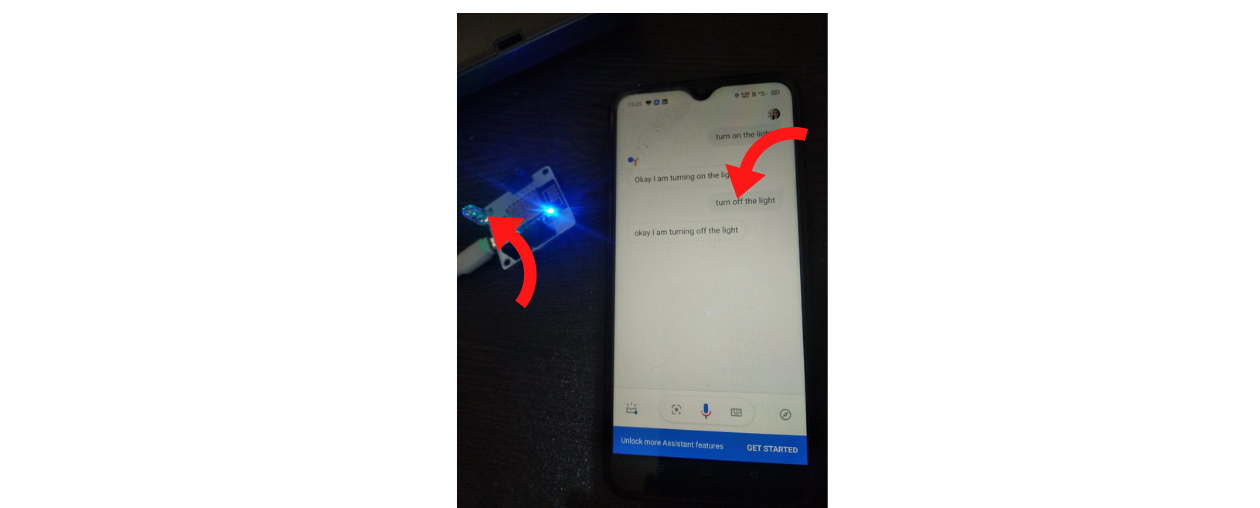
In the following image, I have used the same google account which I have used in signing in to IFTTT and with which I have created triggers to on and off the LED, and have asked the google voice assistant to turn on the LED and the LED is turned on within milliseconds.
I have created a similar trigger for turning off the LED and it can be seen below.
conclusion on Bolt API:-
Thus, we have successfully created a voice-controlled LED using Bolt API. First of all, we have completed the hardware set-up then we moved to bolt API and the URL generation step, then we moved on to IFTTT and created the trigger. If you have sincerely followed all the steps you have already made it, else you need to look at the steps one more time.
Written By: Priyanshi Omer
Reviewed by Batta Pruthvi
If you are Interested In Machine Learning You Can Check Machine Learning Internship Program
Also Check Other Technical And Non Technical Internship Programs